Making the Most of your Carpentry Setup
Whether you’re working with a group of eager young builders at school or kindy or encouraging creativity at home, having a well-organized woodworking setup can make a world of difference.
Here’s how to get the most out of your space and tools, no matter the size or setup!

Start with the Basics:
Ensure you have the essential tools for the age and skill level of your kids.
A hammer and nails or screwdriver and screws, plus a good selection of craft wood is all you need to start joining wood together to build basic projects.
As your children’s skills progress, add in hand drills, hand saws, rasps, etc., allowing them time to master each new tool properly before introducing the next one.
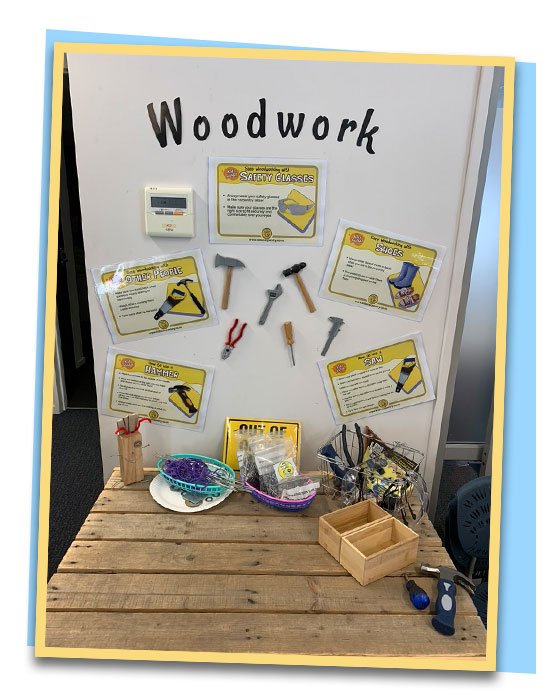
Create a Dedicated Space:
Whether it’s an area in your classroom or a corner of your garage at home, try to designate a special space for woodworking. A defined area free from too many distractions will help keep to kids focused, tools contained and everyone safe.

Safety First:
Kids should always wear protective gear like safety glasses and earmuffs to protect their eyes and ears while woodworking. Gloves can be helpful when sawing or whittling but may interfere with more delicate tasks, so use them when appropriate.
Make sure adults are being good role models by wearing safety gear too!
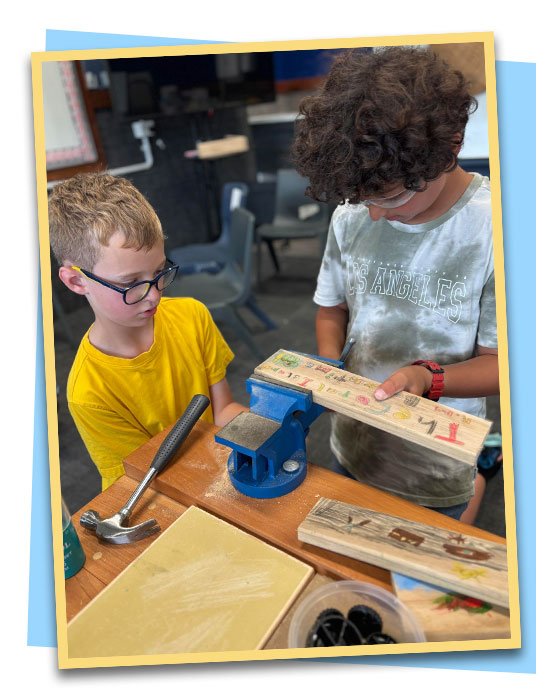
Have a Workable Surface:
Make sure you have a sturdy workbench or table solid enough to handle hammering and sawing without shifting around. The work surface should be at the right height for the kids to work comfortably.

Don’t overcrowd the workbench!
If you have larger groups of kids and limited bench space, you can set them up on the ground for hammering and screwing, while leaving the workbench clear for sawing. (Be sure to protect flooring and decks with mats or plywood sheets underneath.)
Keep It Stocked:
Regularly check supplies of nails, screws, glue and wood to ensure you don’t run out mid-project.
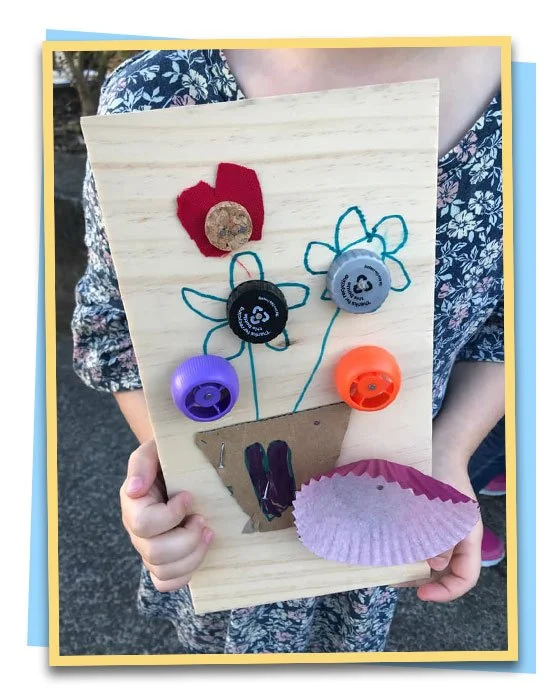
Add some fun upcycled items - buttons, bottle caps, corks, beads, fabric scraps - anything kids can use to personalise their creations. These small items can transform a simple project into a creative masterpiece! Keep an eye out for other “junk” that could spark imagination, like spare nuts, bolts, washers, old CDs, straws, wool or even egg cartons. The more they have to work with, the more creative they’ll get!
With the right setup, kids can get creative and make the most of their woodworking time. A little planning and organisation goes a long way in keeping things safe, fun, and inspiring for everyone!
Ready to set up your perfect woodworking space? Check out our full range of kids carpentry equipment to get started!